Sensors
The original version of this document is located at https://docs.qfield.org/how-to/advanced-how-tos/sensors
Sensors
QField supports background sensor logging, allowing you to passively collect sensor data, display live measurements on the map canvas, and store readings inside feature attribute fields.
Activating Sensors
📱 Fieldwork
You can toggle and manage registered sensors from under your project settings.
Workflow
- Open the Side Dashboard.
- Tap the three-dotted menu (⋮) and select Sensors.
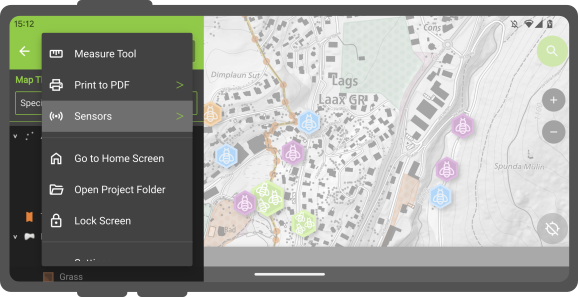
- Tap a sensor name in the submenu to toggle data collection.
When active, a sensor icon displays next to the sensor name; when inactive, a dot icon displays.
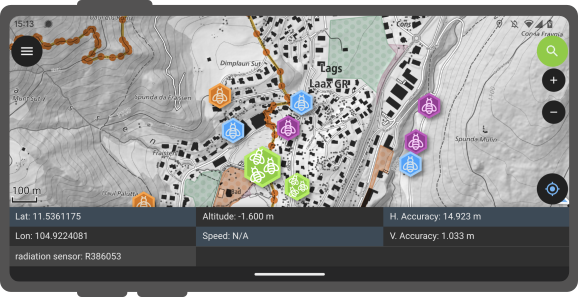
Active sensors collecting data display live readings inside a sensor information panel at the bottom of the map canvas.
Sensor-Driven Tracking
You can also store live sensor readings linked to GNSS positions by initiating tracking sessions on point vector layers.
Configuration in QGIS
🖥️ Desktop preparation
Workflow
- In QGIS, open Vector Layer Properties… > Attribute Form for your target point layer.
- Select the attribute field intended to store sensor readings.
- Set Default Value to
sensor_data('sensor_name')(replace'sensor_name'with your target sensor identifier).
Read more on default values here.
Running Sensor-Driven Tracking
📱 Fieldwork
Workflow
- Open your project in QField and initiate a tracking session on the configured point layer.
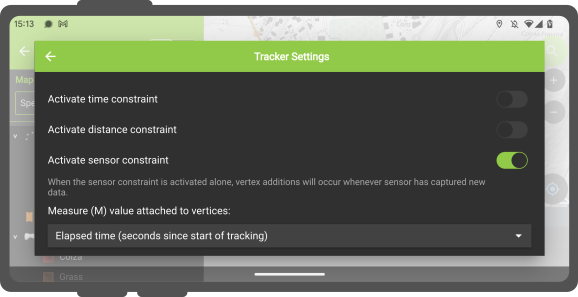
- (Optional) Enable the sensor constraint toggle when configuring the tracking session to record a new point feature each time the sensor captures new data.